How to Create an Access Token
This document explains how to create an Access Token in GitLab for Git Deployment with read-only access to the project repository.
This token is only used to pull source code, with no permission to push or make any changes.
When Is This Token Used?
- Git Deployment (auto pull)
- Private repository
- Secure access (read-only)
Creation Steps
1. Open GitLab Settings
- Log in to GitLab
- Click your profile photo in the top right
- Select Preferences

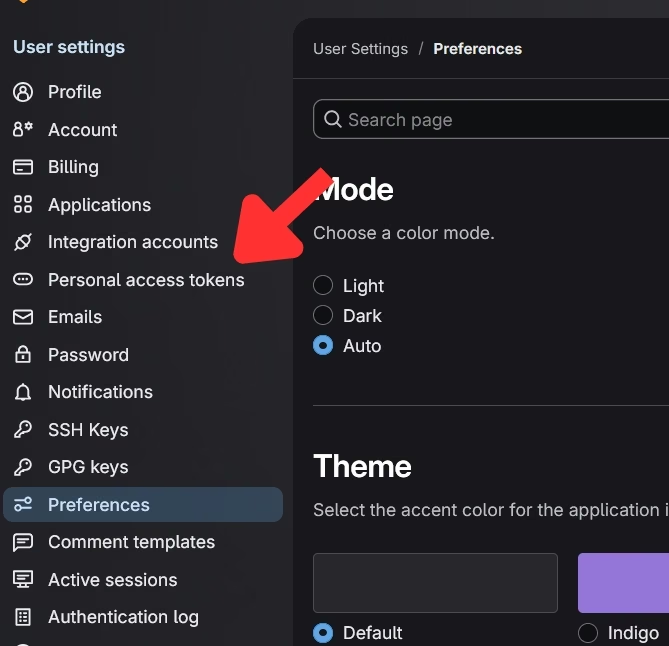
2. Go to Access Tokens
Navigate to:
Preferences → Access Tokens
3. Create a New Token
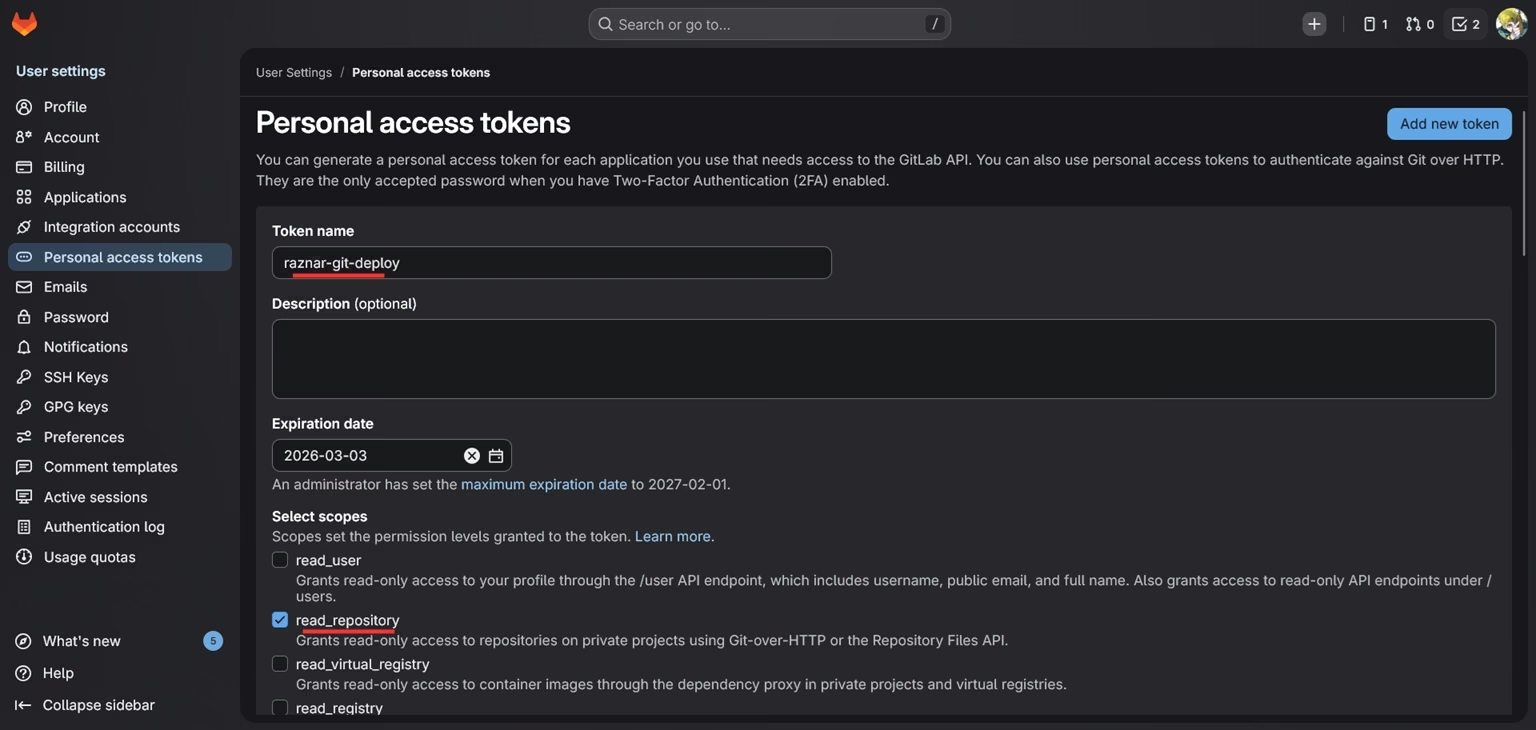
Fill in the token form:
-
Token name
Example:raznar-git-deploy -
Expiration date
As needed -
Scopes
Check only:read_repository
⚠️ Do not check any other scopes.
4. Generate & Save the Token
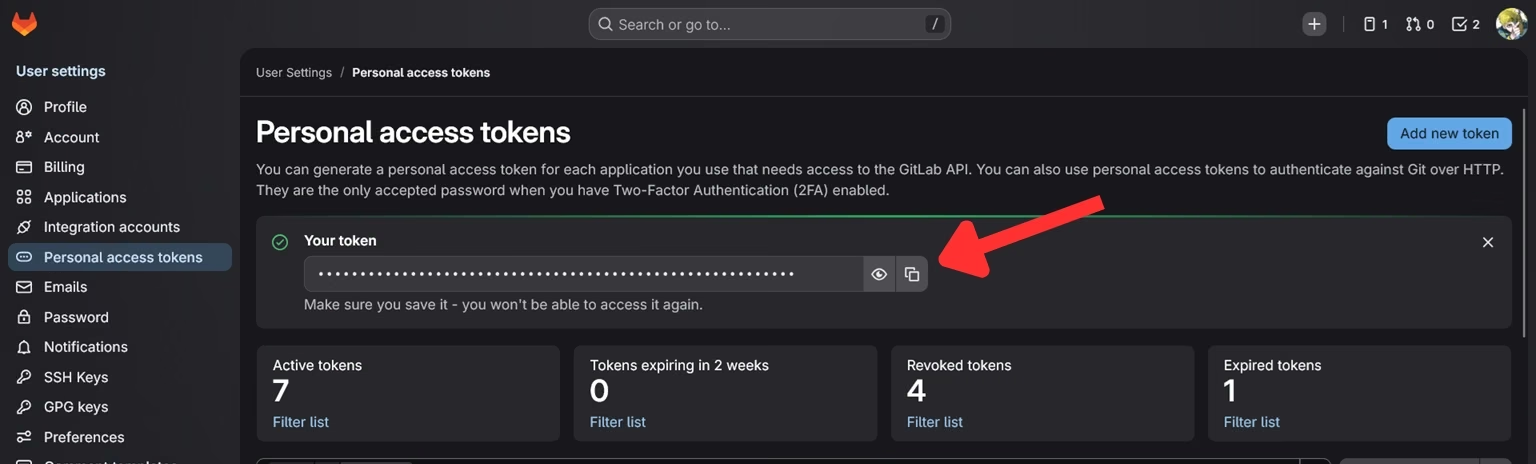
Click Create access token, then copy the token that appears.
IMPORTANT
The token is only shown once.
Make sure to store it safely.
Using the Token
Use the token when configuring the repository on the server.
Example repository URL:
https://oauth2:<ACCESS_TOKEN>@gitlab.com/username/repository.git
Security Notes
- Use a read-only token
- Don't share the token with anyone
- If the token leaks, revoke it immediately