Guide: How to Create a Client Certificate in Cloudflare
This document explains how to create a Client Certificate inside the Cloudflare dashboard. This certificate will act as an "identity card" or "key" that you can give to clients (browsers, scripts, or other servers) to access your protected application.
This is the first and most important step in configuring Mutual TLS (mTLS) or Zero Trust Security.
Prerequisites
What is a Reverse Proxy?
A Reverse Proxy acts as a secure intermediary between the client and the server. The client only accesses the public domain, while the server's real IP and port are hidden and protected by Cloudflare.
Before you begin, make sure you have:
- An active Cloudflare account.
- A registered domain that is already registered and active within the Cloudflare account.
Step 1: Creating a Cloudflare Certificate
Follow these steps to create your certificate.
I. Navigate to the SSL/TLS Dashboard
Log in to your Cloudflare Dashboard and select the domain you want to manage.
II. Select the Client Certificates Menu
In the sidebar menu on the left, navigate to: SSL/TLS -> then click the Client Certificates tab.
III. Start Creating a Certificate
Click the blue "Create Certificate" button on the right side.
IV. Configure Creation
You'll be presented with several options:
-
"Generate private key and CSR with Cloudflare":
- Best Choice: Leave this selected. This is the easiest way, where Cloudflare will generate a key pair (Private Key and Certificate) for you.
- Alternative: The
Use my private key and CSRoption is only for advanced users who create their own keys using OpenSSL.
-
Private Key Type: Leave it as
RSA (2048)for the best compatibility. -
Certificate Validity:
- This is the validity period of your certificate. For security reasons, Cloudflare limits it to 10-15 years.
- Choose
10 years(or15 yearsif available) for long-term use so you don't have to renew it often.
V. Create and Save Your Keys
Click the "Create" button.
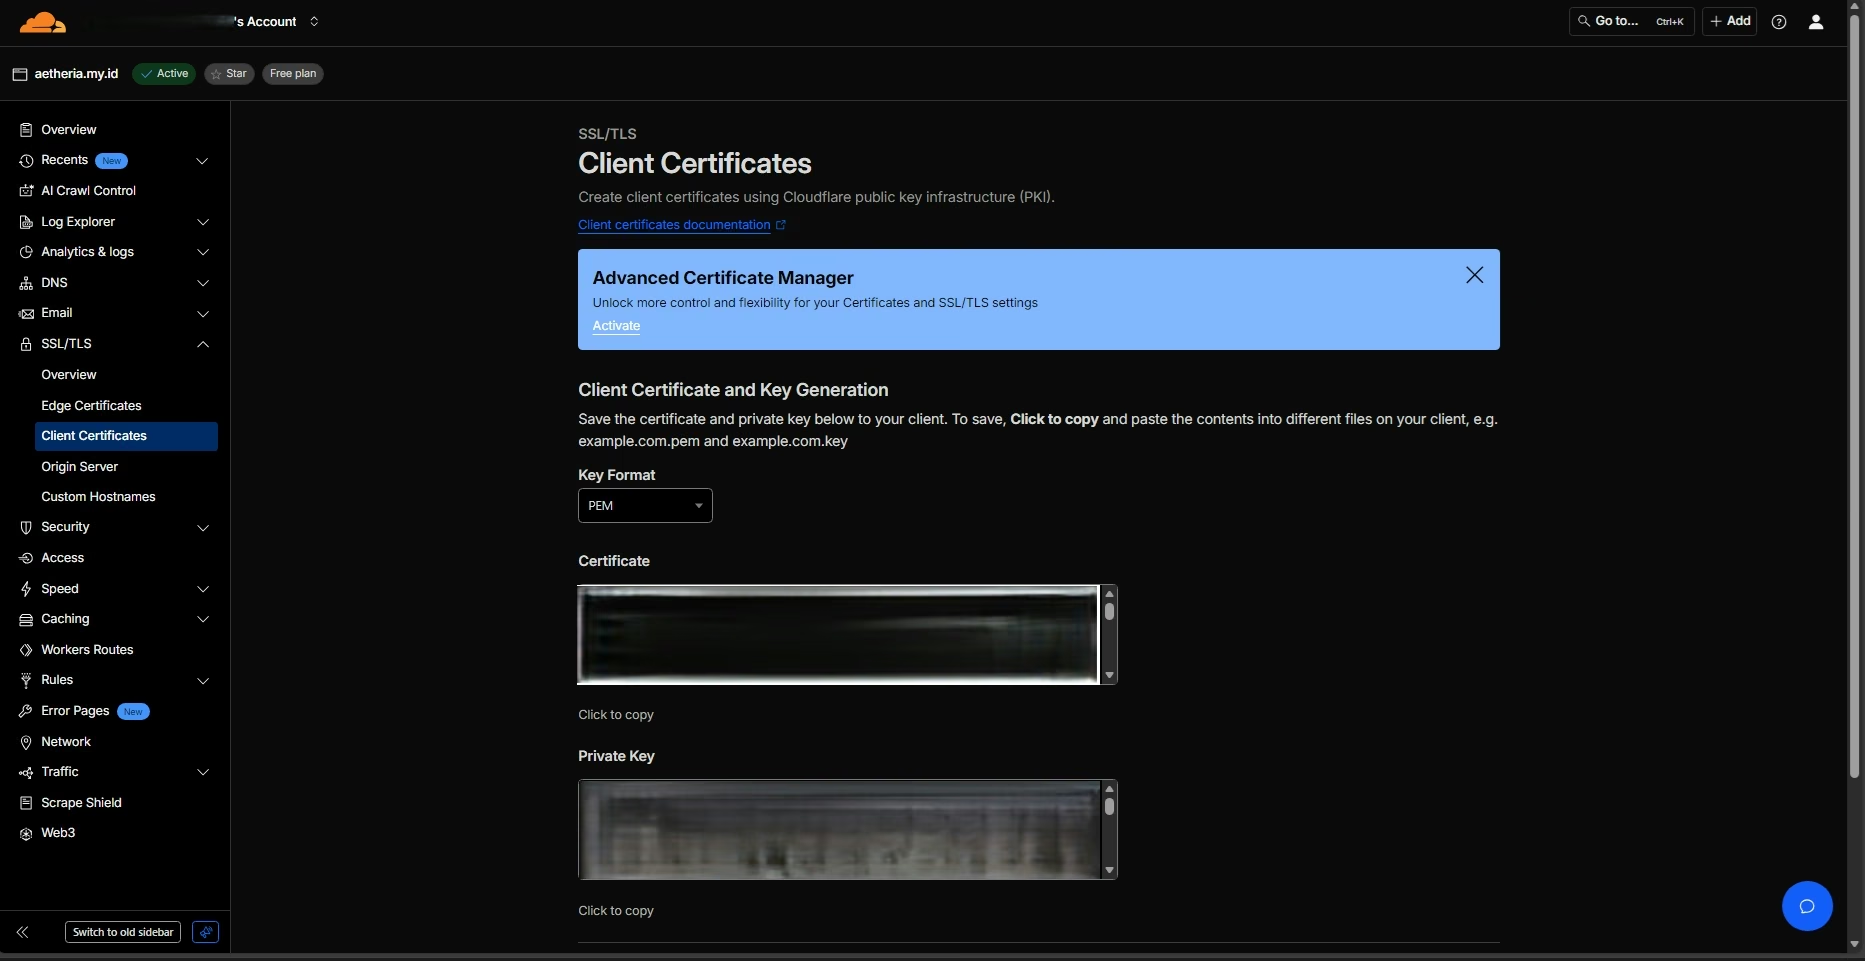
After a few seconds, Cloudflare will display a new page containing two very important pieces of text: Certificate and Private Key.
You must save both of these values immediately.
Cloudflare will ONLY display the Private Key once. If you close this window or refresh the page, the Private Key will be lost forever and you'll have to repeat this process from the beginning.
Actions You Must Take:
-
Copy the Certificate:
- Copy all the text inside the Certificate box, including
-----BEGIN CERTIFICATE-----and-----END CERTIFICATE-----. - Paste it into a new text file on your computer.
- Save the file with the name
client.pemorcertificate.pem.(Optional)
- Copy all the text inside the Certificate box, including
-
Copy the Private Key:
- Copy all the text inside the Private Key box, including
-----BEGIN PRIVATE KEY-----and-----END PRIVATE KEY-----. - Paste it into a different new text file.
- Save the file with the name
client.keyorprivate.key.(Optional)
- Copy all the text inside the Private Key box, including
Store both files somewhere very safe, as if they were your main password.
Step 2: Configuration
- Open and log in to the Raznar Panel
- In the sidebar menu, navigate to the "Account" section,
- Inside the "Account" menu, select "Proxy Domain",
- Click "Add Proxy Domain" to add a new domain
- Fill in the form with the exact details from the previous step:
- DOMAIN: Fill in with the full domain name you configured in Cloudflare. In this example, we use
aetheria.my.id. - PUBLIC CERTIFICATE: Open the
client.pem(orcertificate.pem) file you saved. Copy all of its contents and paste them into this field. - PRIVATE KEY: Open the
client.key(orprivate.key) file you saved. Copy all of its contents and paste them into this field.
- DOMAIN: Fill in with the full domain name you configured in Cloudflare. In this example, we use
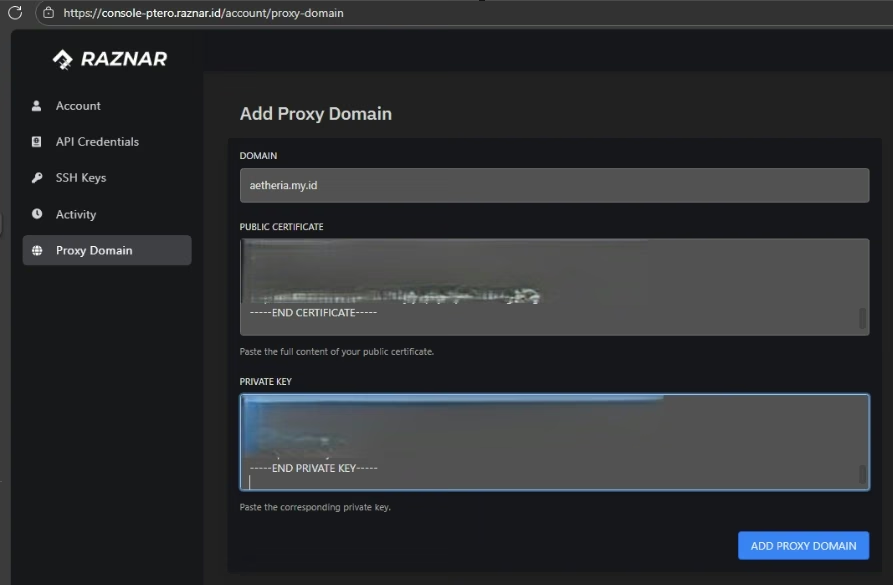
As instructed, you don't need to change a single character.
Just copy and paste as is. Make sure you copy everything, including the -----BEGIN CERTIFICATE----- and -----END PRIVATE KEY----- lines. There should be no extra spaces or deleted characters.
- Once the three fields are filled in, click the "ADD PROXY DOMAIN" button.
Step 3: Creating a Proxy Connection and Setting Up DNS
In this step, we'll do two things in one workflow:
- In the Raznar Panel: Create a reverse proxy rule to link a public hostname (e.g.:
panel.domain.com) to your internal service (e.g.:...:10000). - In Cloudflare: Point that public hostname to the IP Address provided by Raznar using an
A Record.
I: Creating a Reverse Proxy Rule
-
In the Raznar panel, navigate to the specific server you want to configure.
-
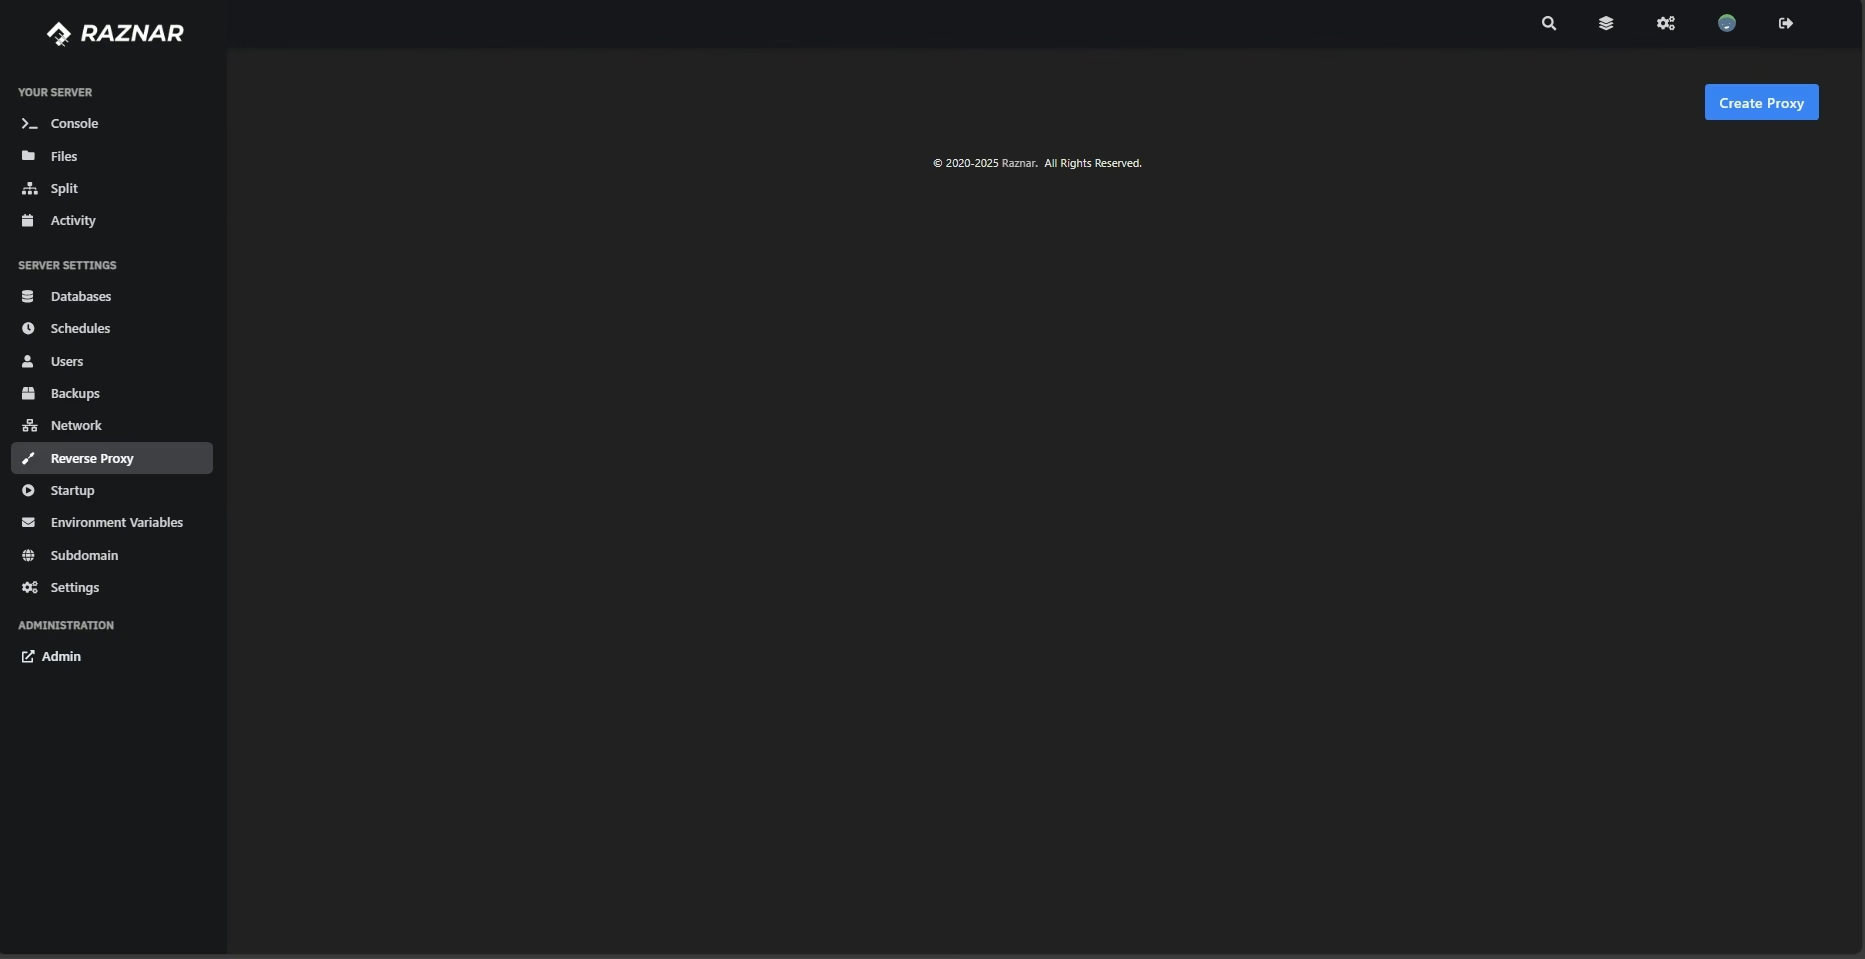
In the server sidebar menu, click the "Reverse Proxy" option.
-
Click the blue "Create Proxy" button in the top right corner.
-
Fill in the "Create Reverse Proxy" form with the details:

- Allocation: Select an allocation (internal IP and Port) from your server. This is the internal "destination" of your proxy.
- Domain: Select the root domain you've authenticated with the mTLS certificate (from Step 2).
- HOSTNAME: Type the full hostname (subdomain) that will be used publicly, example:
panel.aetheria.my.id.
-
Click the "Create Proxy" button.
II: Setting Up the DNS Record (Cloudflare)
After you create the proxy, you need to point your domain to it.
-
On the Raznar "Reverse Proxy" page, you'll see the proxy you just created. Click the "Information" button next to it.
-
A pop-up will appear, giving you the "DNS Setup Guide". This is the information you need.

Pay attention to the details:
- Type:
A - Name:
panel.aetheria.my.id(or whatever you entered inHOSTNAME) - Value:
xxx.xx.xxx.xx(This is the IP of your proxy endpoint)
- Type:
-
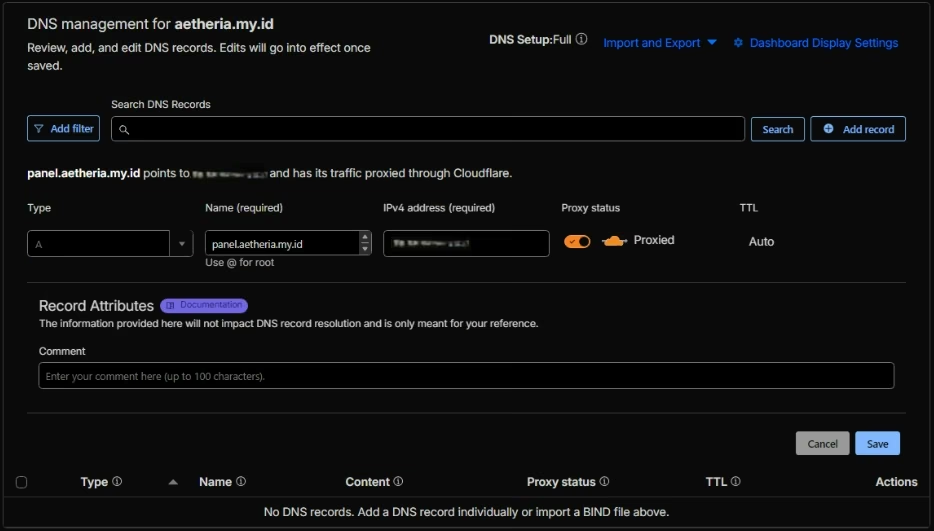
Now, open your Cloudflare dashboard and navigate to DNS > Records for your domain.
-
Click "Add record" and fill it in exactly as the guide from Raznar:
- Type:
A - Name:
panel(orpanel.aetheria.my.id. Cloudflare will handle it correctly). - IPv4 address:
xxx.xx.xxx.xx(Copy from the "Value" in the Raznar guide). - Proxy status: MUST be Active (Proxied). The cloud icon must be Orange.
- Type:
-
Click "Save".
Additional: SSL/TLS Encryption Settings
Before we finish, there are two important settings in Cloudflare to ensure your connection is always secure and encrypted end-to-end.
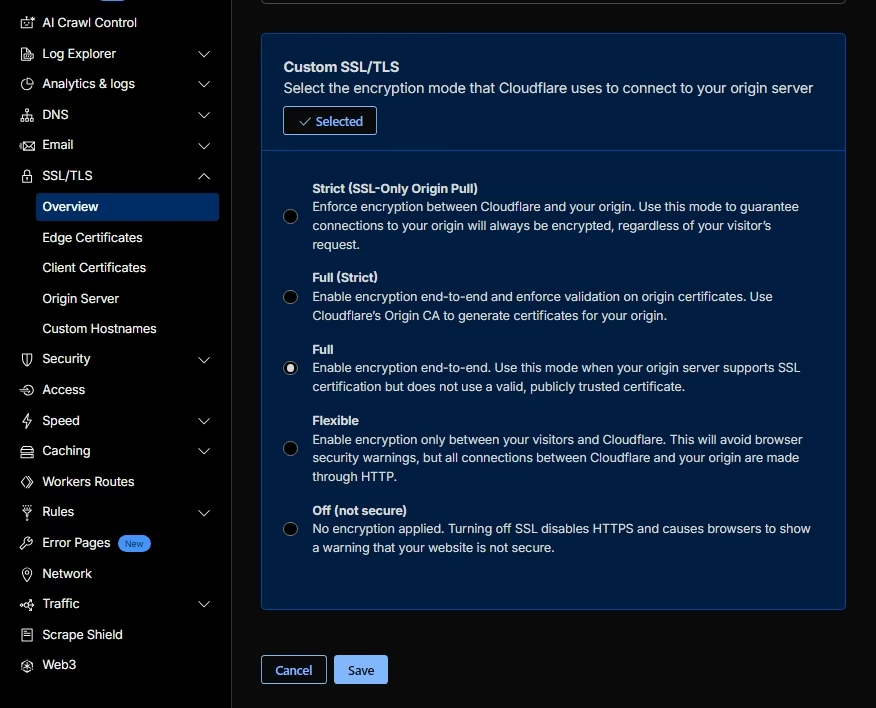
I. Set the Encryption Mode to "Full"
This ensures the connection from Cloudflare to your Raznar server is also encrypted.
-
In Cloudflare, navigate to SSL/TLS > Overview.
-
Find the SSL/TLS encryption section.
-
Select the "Full" option. This setting enables end-to-end encryption without requiring strict certificate validation on the origin server side, which is ideal for this setup.
-
Click "Save".
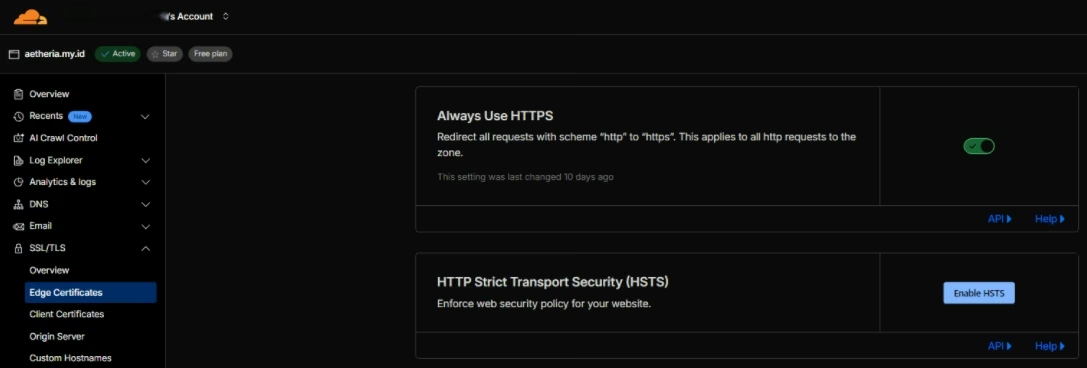
II. Enable "Always Use HTTPS"
This forces all visitors to use a secure https connection.
-
Still in Cloudflare, navigate to SSL/TLS > Edge Certificates.
-
Scroll down until you find the "Always Use HTTPS" card.
-
Make sure the toggle switch is in the On position (active/green).