Complete Guide to Creating Automatic Schedules
The Schedule feature lets your server do tasks automatically without you having to monitor it 24 hours. For example: the server automatically restarts every morning, or automatically performs a backup every few hours.
Creating this schedule is divided into two stages that must be done in order: Stage 1 (Creating the Schedule/Time) and Stage 2 (Adding the Task).
Stage 1: Creating a Schedule
The first step is determining WHEN the system should work.
- Open the Game Panel and go into your server.
- In the menu on the left, click Schedules.
- Click the blue Create schedule button.
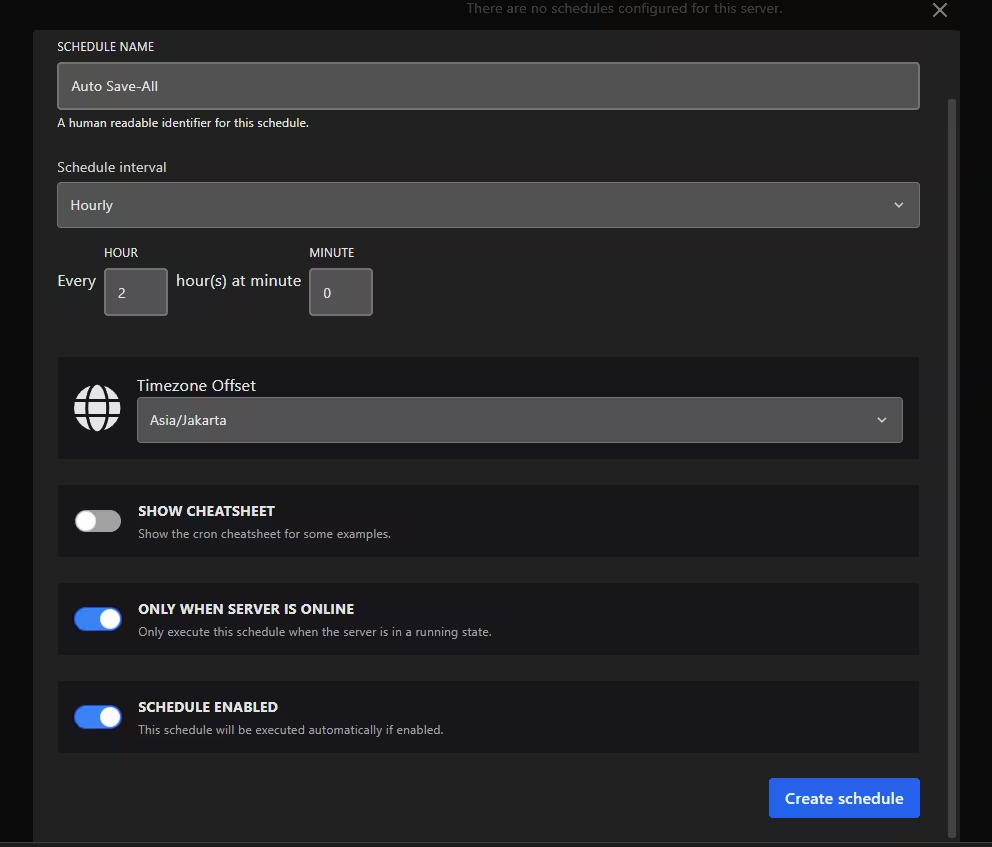
- A settings window will appear. Fill it in according to the guide below:
- SCHEDULE NAME: Give it any name so you remember it (Example: "Morning Auto Restart").
- Schedule interval: Click and select how often this schedule repeats.
- Minutely: Repeats every few minutes.
- Hourly: Repeats every few hours.
- Daily: Runs every day at a certain hour.
- Weekly: Runs once a week on a certain day.
- Monthly: Runs once a month on a certain date.
- Timezone Offset: Make sure you select Asia/Jakarta so the time matches Western Indonesian Time (WIB).

- Leave the other settings (like Schedule Enabled) turned on, then click the blue Create schedule button at the very bottom.
Stage 2: Giving It a "Task"
Once the time schedule is created, it's still empty. We have to tell the server WHAT to do when the time comes.
- On the Schedules page, click the Schedule Name you just created in Stage 1.
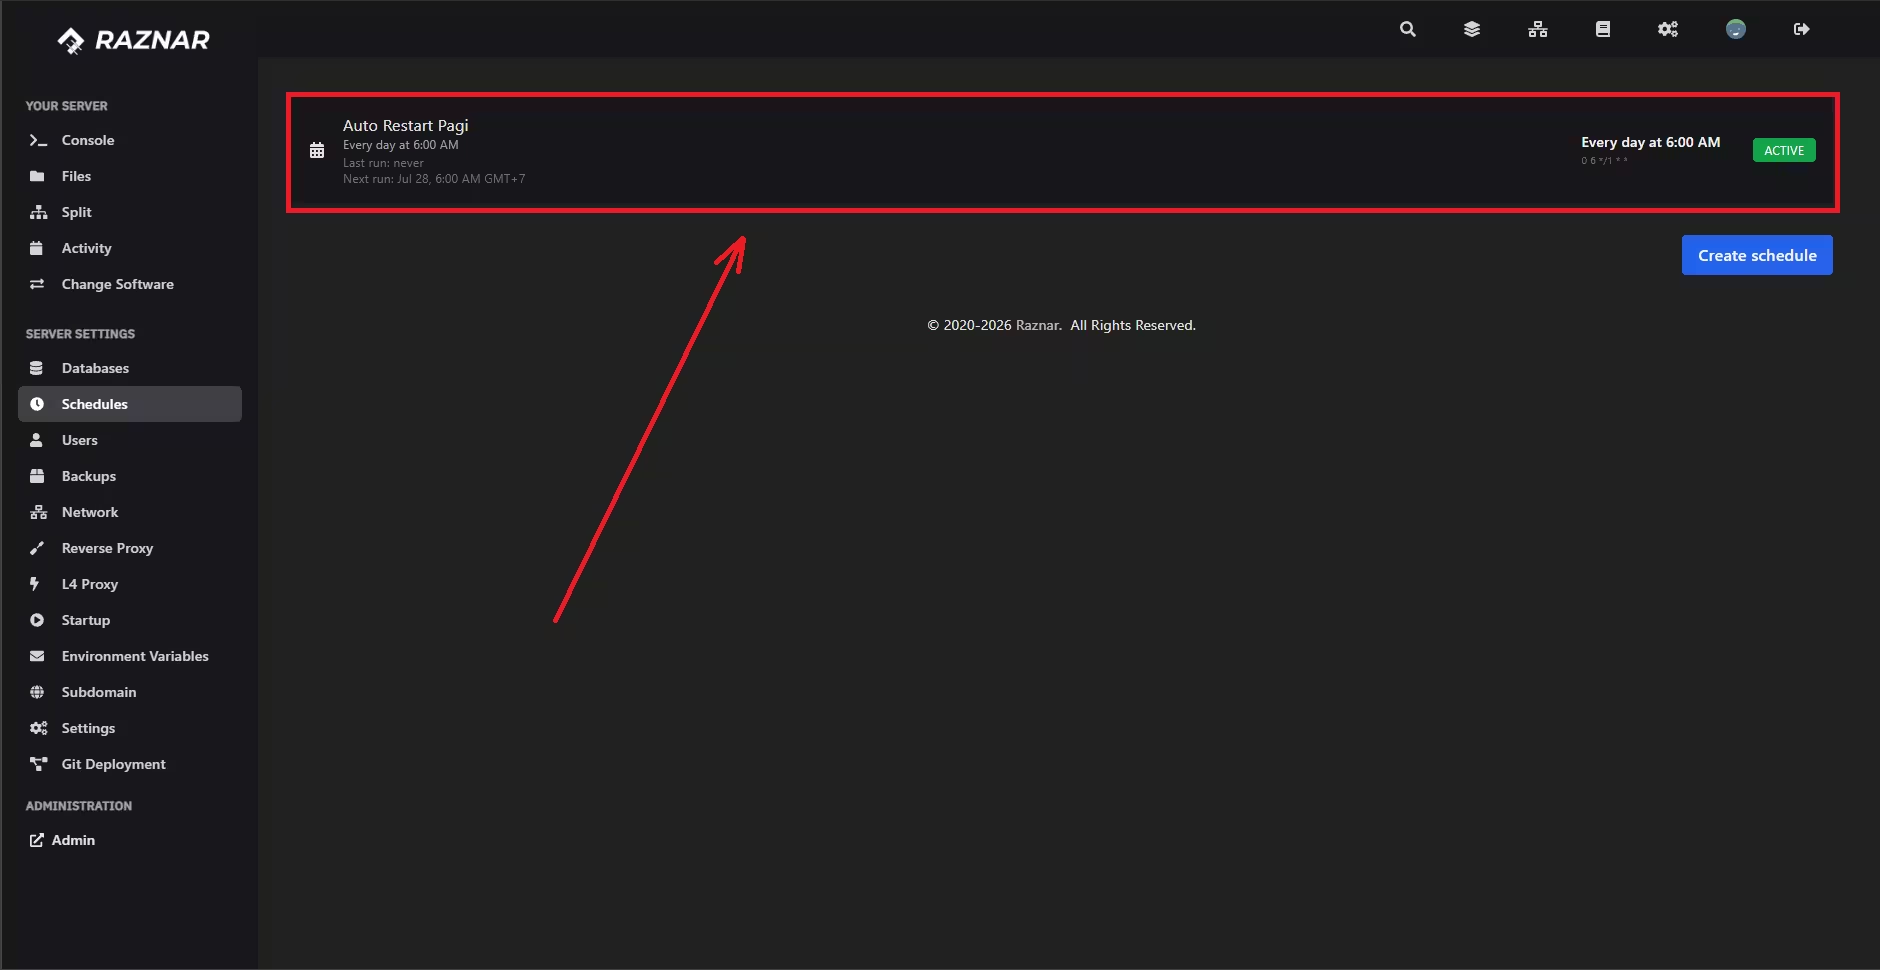
- In the top right corner, click the blue New Task button.
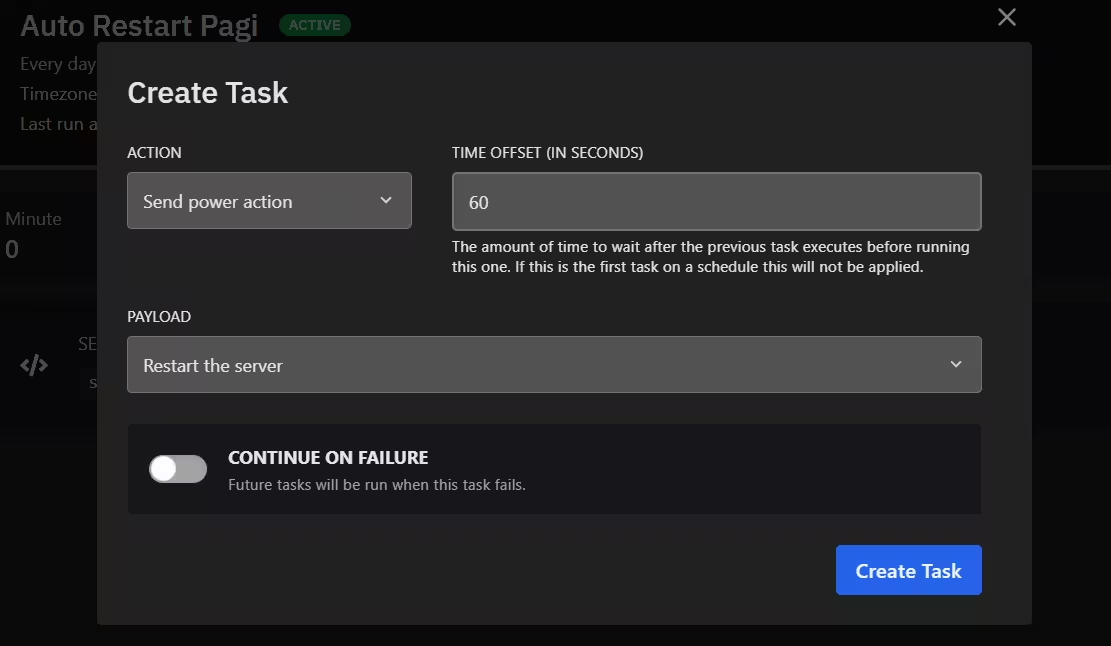
- A task settings window will appear. In the ACTION section, choose one of the tasks to run:
- Send command: Sends a command into the game (Example command:
say Server will restart in 1 minute). Note: Don't use the leading slash (/). - Send power action: To control the server machine (Options: Start, Stop, Restart, or Kill).
- Create backup: Tells the panel to back up your server files.

- Send command: Sends a command into the game (Example command:
- In the TIME OFFSET (IN SECONDS) field, it means setting the delay time (in seconds).
- If this is the first task, fill it with the number 0.
- If you have a follow-up task, you can set it to wait (Example: type
60so this task waits 1 minute after the previous task finishes).
- Finally, click the blue Create Task button. Done!
Another Example (auto save-all on a Minecraft Java server)
Step 1: Open Schedules and click Create schedule
- Schedule Name: Auto Save-All
- Interval: Hourly (Set Every 1 Hour)
- Timezone: Asia/Jakarta
- Click Create schedule.
Step 2: Create the Command Execution in the Console:
- Create Task:
- Action: Send command
- Command:
save-all - Time Offset:
0 - Click Create Task.
