How to Change the Server Version (Automatic)
The Versions feature in the Raznar panel lets you install a specific Minecraft version with ease.
Before starting, know the difference in steps between Upgrade and Downgrade:
- UPGRADE (e.g. 1.20 -> 1.21): You only need to delete the old
server.jarfile. The world and plugin data should NOT be deleted. - DOWNGRADE (e.g. 1.21 -> 1.20): You MUST DELETE ALL DATA (especially the
worldfolder), because a newer-version map will be corrupted if opened in an older version.
Step 1: Back Up Data
Always back up before making major changes.
- Turn off the server (Stop).
- Go to the Files menu.
- Download or archive the important folders (
world,plugins,server.properties).
Step 2: Preparing Files (Important)
Clean up the files according to your goal:
OPTION A: If You're UPGRADING (Moving to a Newer Version)
We just need to throw away the old "engine" so it can be replaced with a new one.
- Open the Files menu.
- Find and delete the
server.jarfile. - (Optional) Delete the
librariesorversionsfolders if present, so the system is truly clean. - DO NOT DELETE the
pluginsfolder. Leave the existing plugins; they'll try to adapt to the new version later (you may need to update plugins afterward).
OPTION B: If You're DOWNGRADING (Moving to an Older Version)
Because the map structure is different, we have to start from scratch.
- In the Files menu, check all files and folders (Select All).
- Click the Delete button.
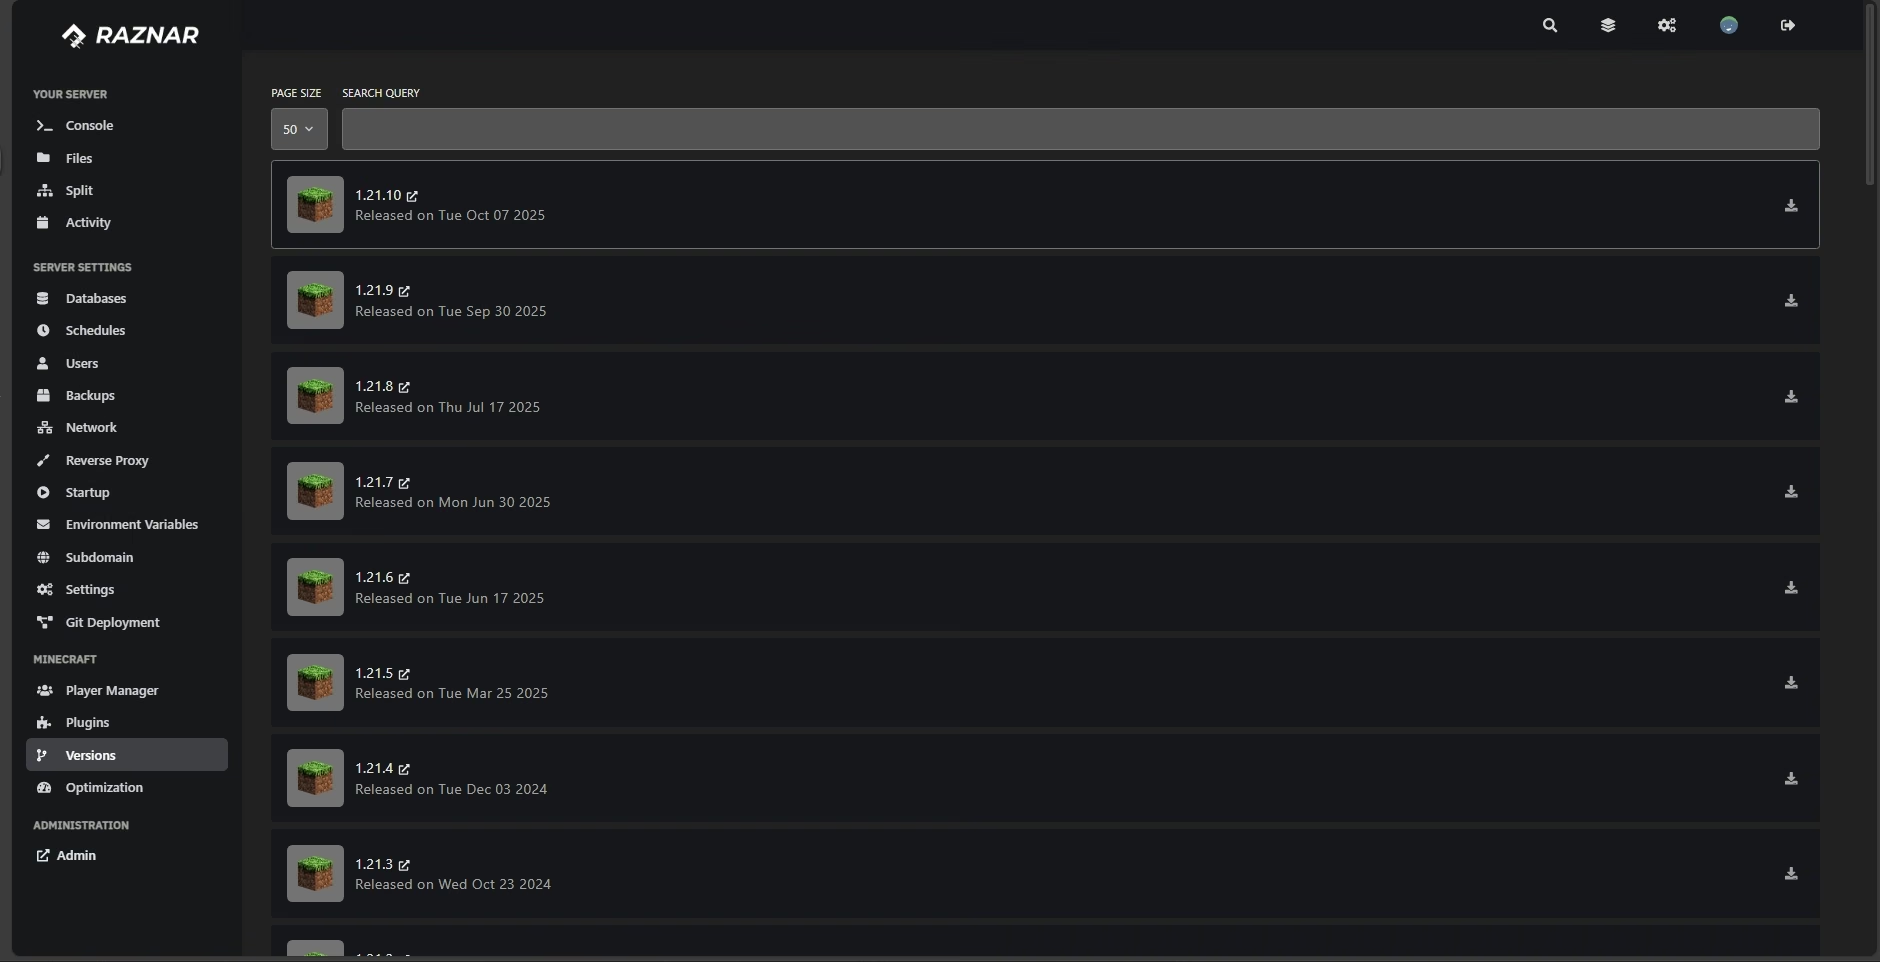
Step 3: The Versions Menu
-
Look at the sidebar menu on the left.
-
Click the menu named Versions.
-
You'll see a list of available Minecraft versions.
Step 4: Choose and Install a Version
-
Find the version you want in the list (for example: 1.21.1).
-
Click the Install / Download button (down-arrow icon) on the right.
-
A confirmation pop-up will appear. Click the red Confirm button.

The panel will automatically download the new server file for you.
Step 5: Start the Server
- Go back to the Console menu.
- Click Start.
- The server will start up with the new version.
Note: If some plugins error on startup, that's normal because some plugins may need to be updated to the latest version to be compatible with the new server version.