How to Install Mods on a Project Zomboid Server
Want your Project Zomboid server to be more fun and different from the rest? Just install mods! In the Raznar panel, adding mods from the Steam Workshop is super easy.
Just enter the ID, restart, and you're good to go. Here are the easy steps:
Step 1: Open the Pterodactyl.ini File
- Open your browser and log in to the Raznar Game Panel as usual.
- Go into your Project Zomboid server, then click the "Files" menu.
- Find and open the
.cachefolder, then go into theServerfolder. - There you'll find a file named
Pterodactyl.ini. Just click the file to open it.
Step 2: Enter the Workshop ID
- Open a new tab, then go to Steam Workshop Project Zomboid and find the mod you want to use.
- Scroll to the very bottom of the mod's description, then copy the Workshop ID number.

- Go back to the Game Panel at the
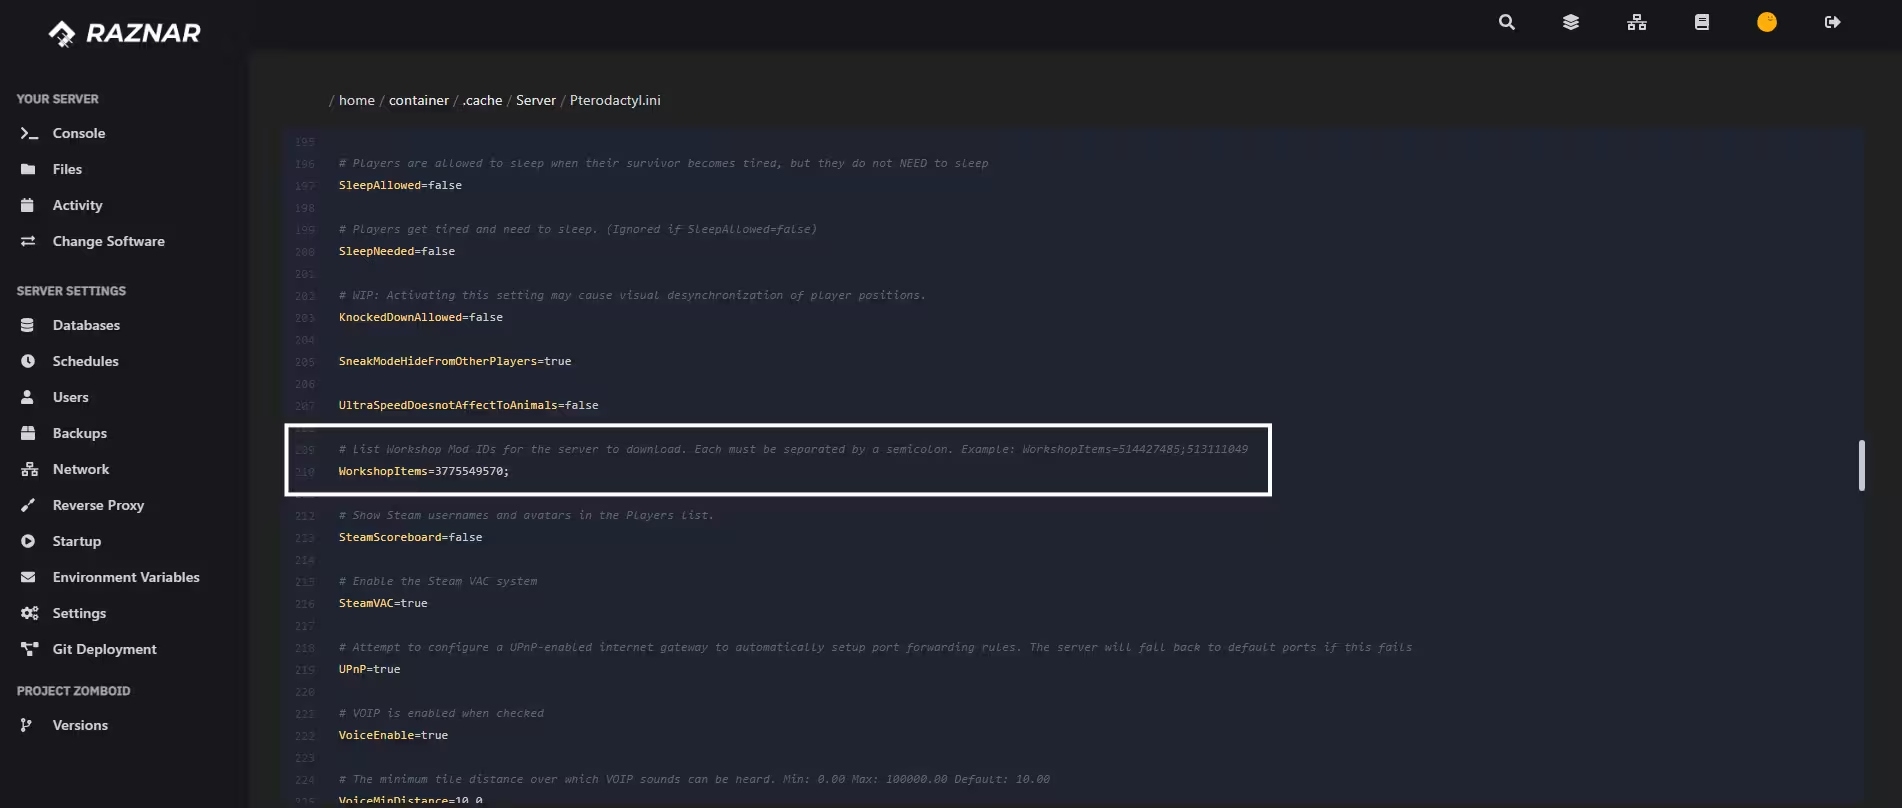
Pterodactyl.inifile from before, scroll down until you find the textWorkshopItems=. - Paste the Workshop ID number you copied right next to it.
Step 3: Enter the Mod ID
- Go back to the mod page on Steam Workshop.
- Find the Mod ID text (it's usually located near the Workshop ID), then copy the text.

- In the
Pterodactyl.inifile, scroll down a bit more to find the textMods=. - Paste the Mod ID text right next to that
Mods=line.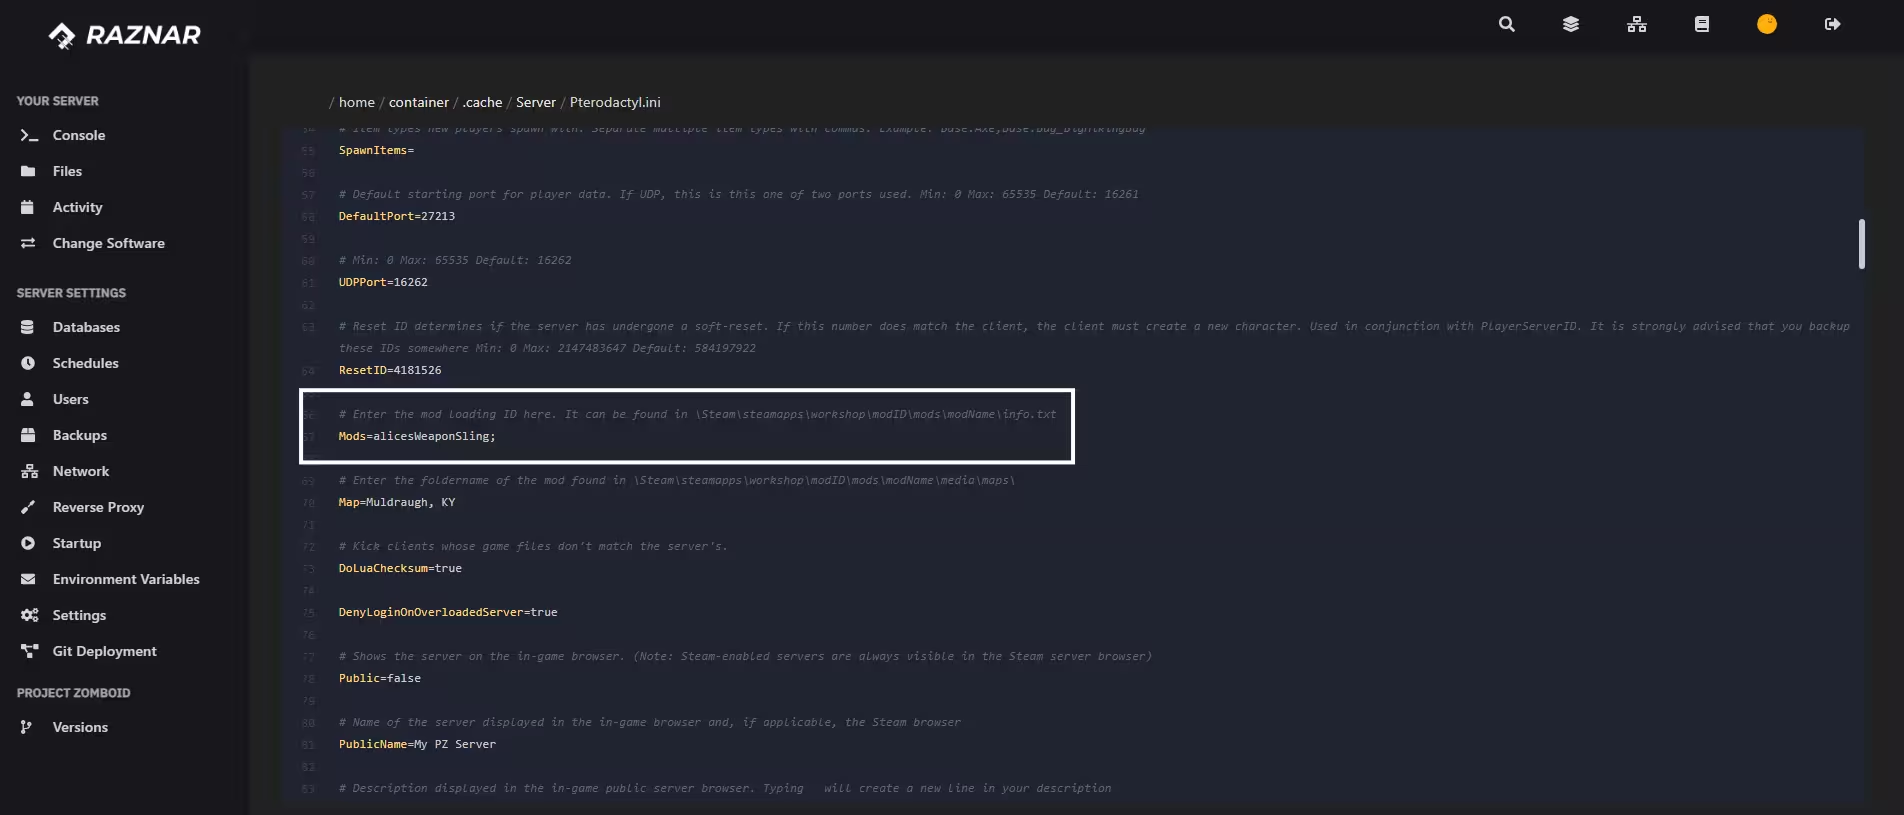
Step 4: Save and Restart
- Once everything is entered, don't forget to click the "Save File" button in the bottom right corner.
- Switch to the Console page, then click the Restart button.
- All done! Wait for the server to start up and your mods will be installed automatically.
EXTRA INFO
If you want to install multiple mods at once, just separate each ID with a semicolon (;) without any spaces.
Here's an example:
WorkshopItems=1234567;89101112;13141516Mods=ModNameOne;ModNameTwo;ModNameThree