How to Import a Minecraft Bedrock World to the Server
Have a finished survival world on your phone or PC and want to move it to a Raznar server? Follow this guide to export your local world and upload it to the server.
This guide is specifically for Minecraft Bedrock Edition servers.
Step 1: Export the World (From Your Phone/PC)
First, we need to grab the world file from your Minecraft app.
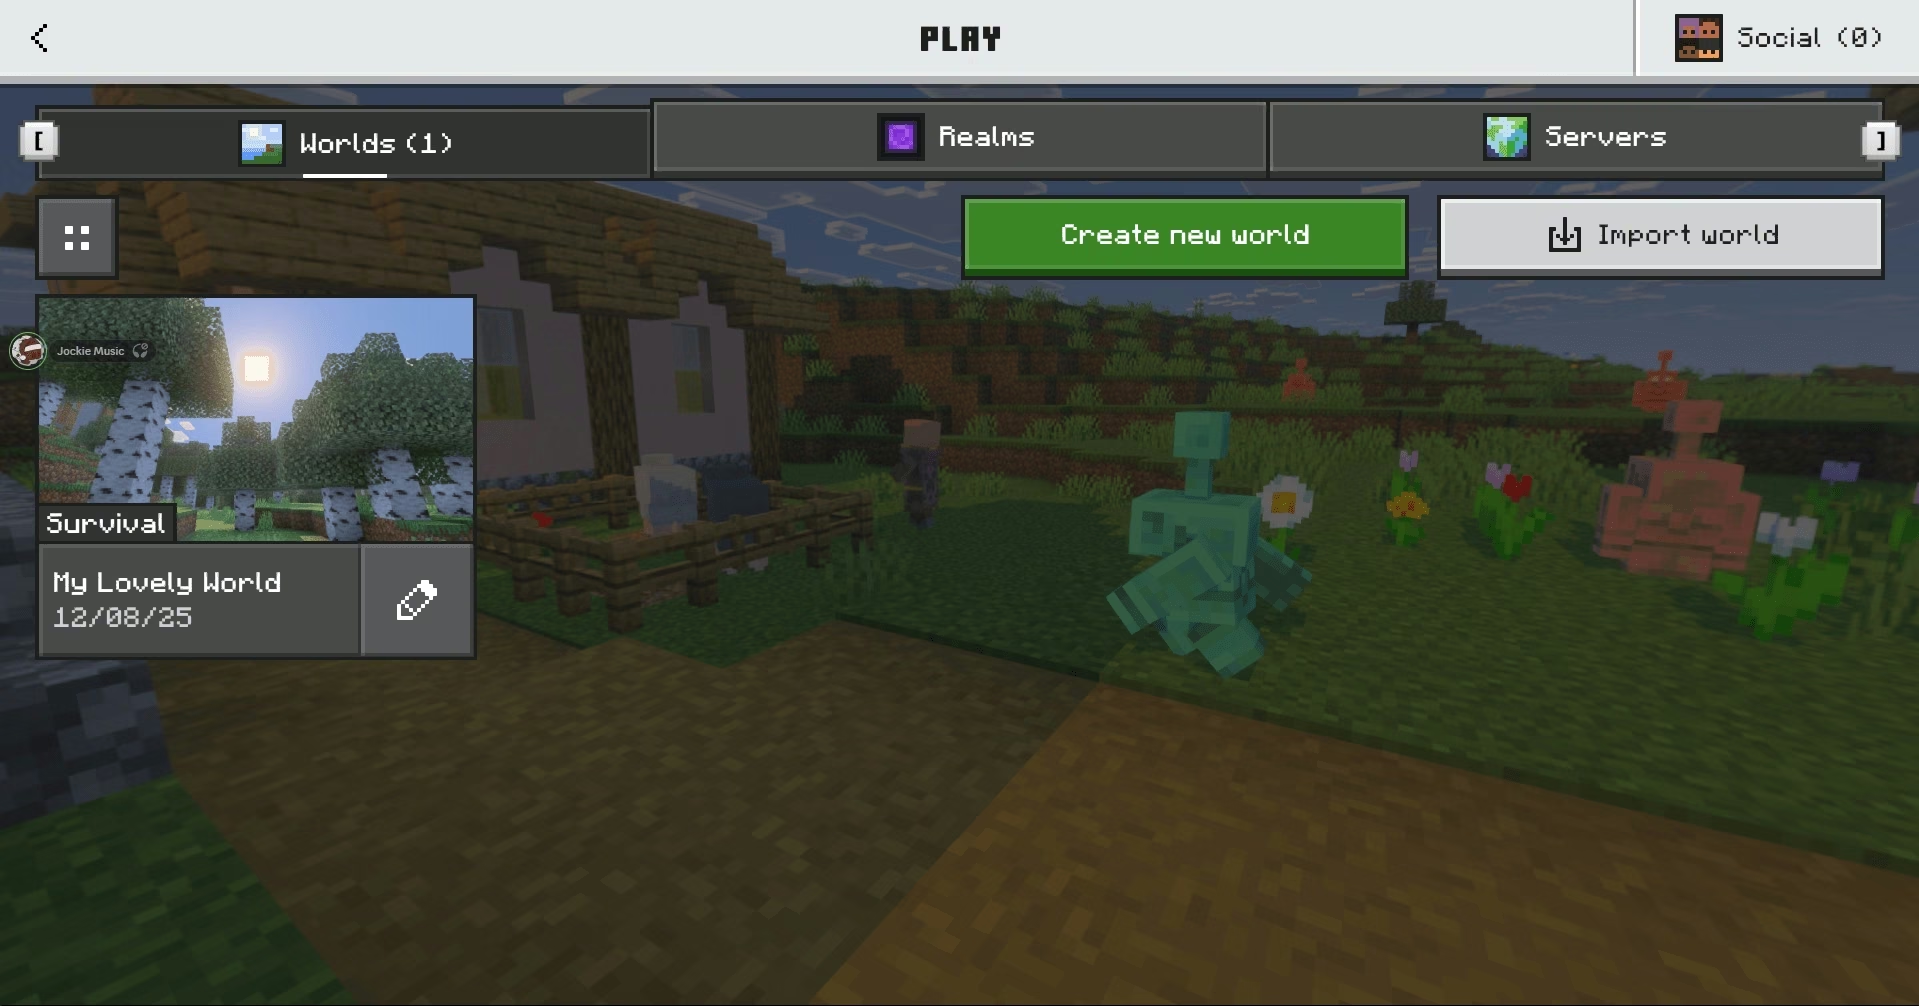
- Open Minecraft and click the Play button.
- Find the world you want to move, then click the Pencil Icon (Edit) to its right.
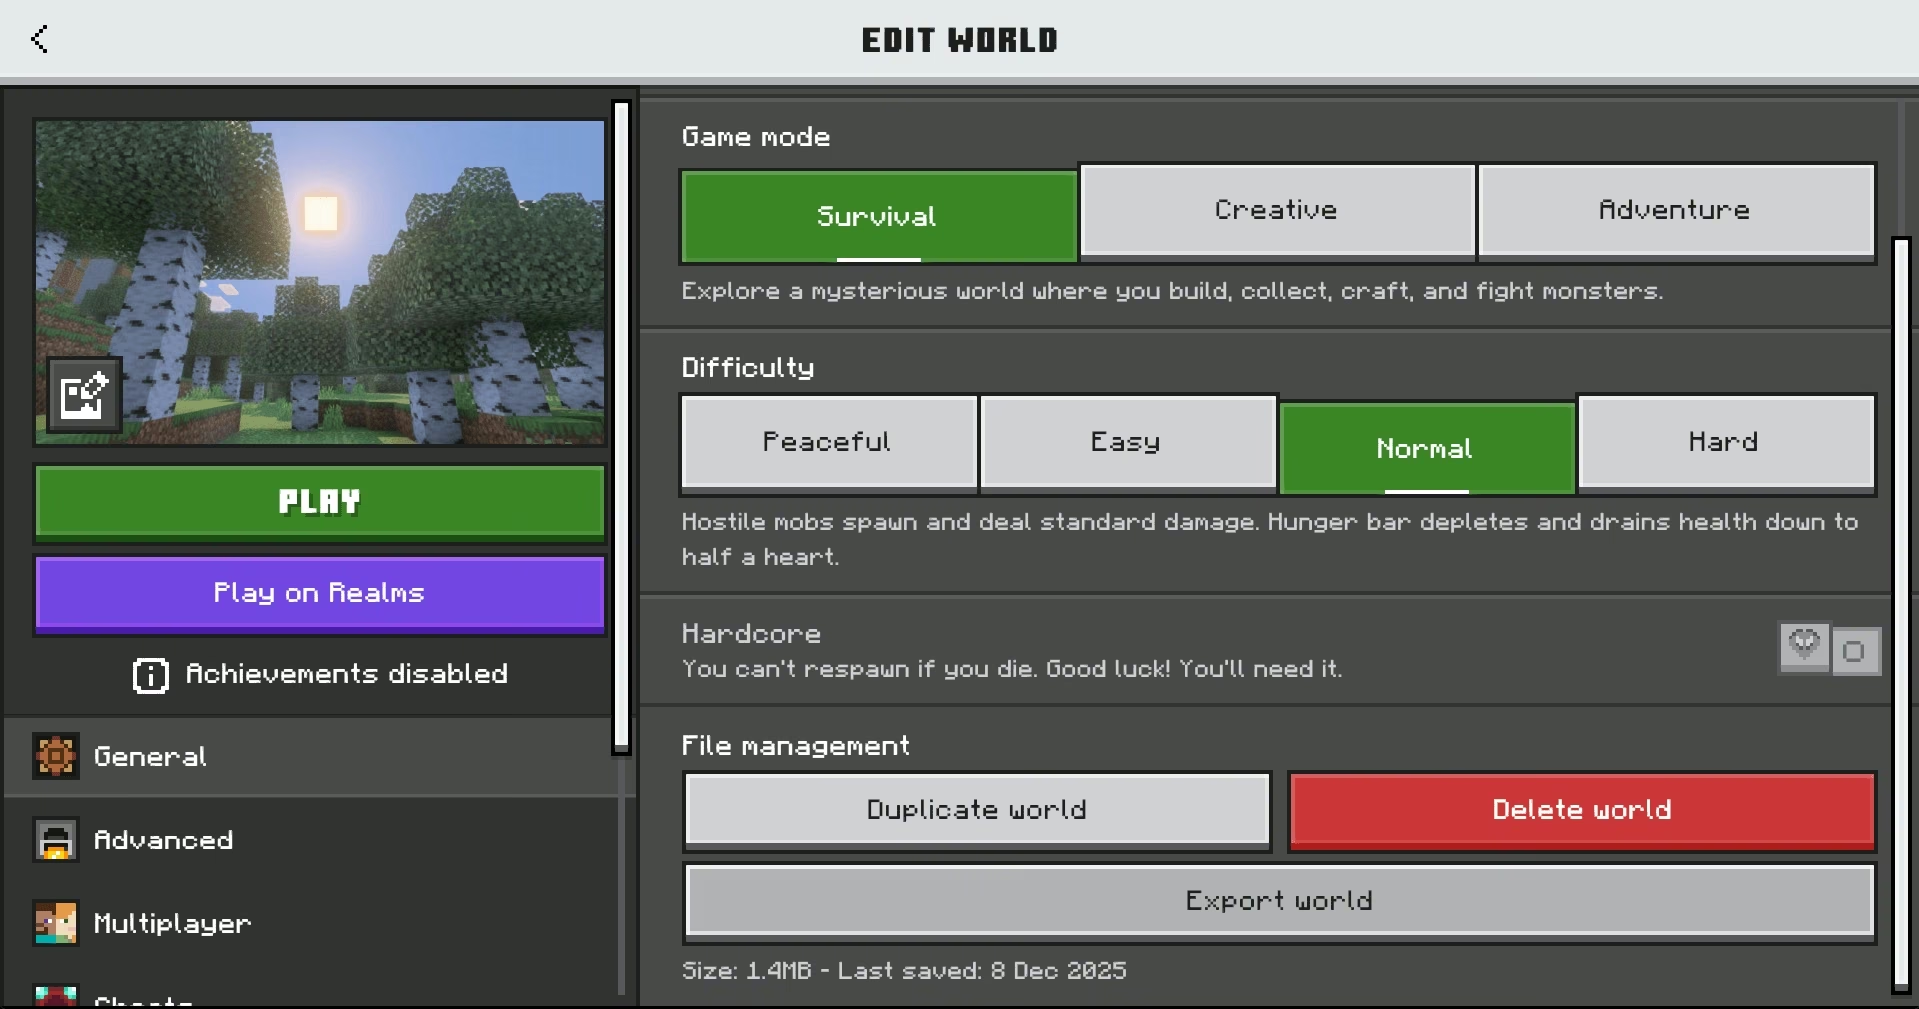
- In the Game Settings menu, scroll all the way to the bottom.
- Click the Export World button.
- Save the file in a folder that's easy to find on your phone or computer (Anywhere is fine).
Step 2: Clear the Old World on the Server
We need to delete the server's default world so it doesn't conflict with your new world.
-
Stop the server (Stop).
-
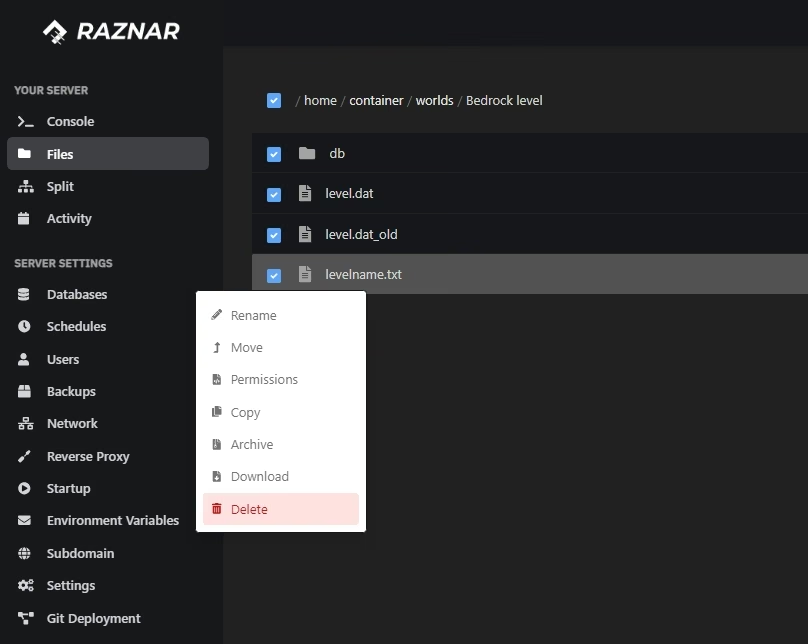
Open the Files menu in the Raznar panel.
-
Navigate to the Bedrock world folder. Its location is usually:
/home/container/worlds/Bedrock level. -
Delete all files and folders inside that
Bedrock levelfolder (such asdb,level.dat, etc.).- Check everything -> Click Delete.
Step 3: Upload and Install the New World
- Make sure you are still inside the
/home/container/worlds/Bedrock levelfolder. - Upload the
.mcworldfile (your world) that you prepared back in Step 2. You can drag-and-drop the file into the file manager.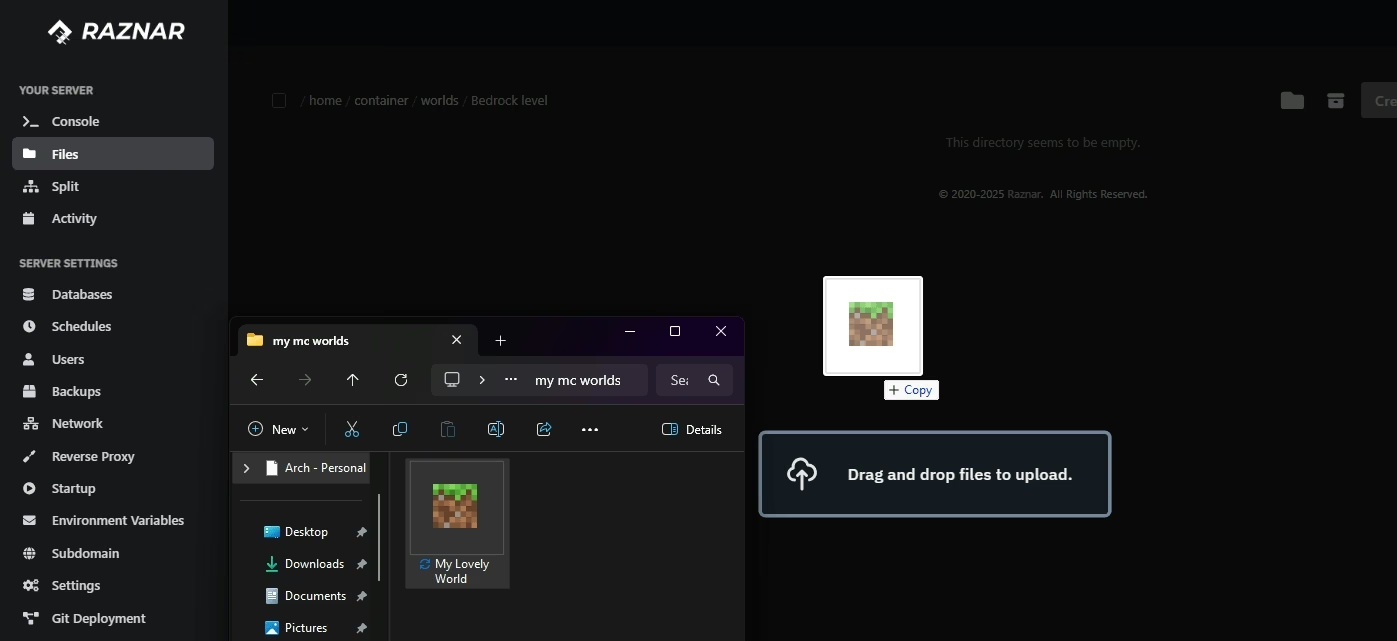
- Once uploaded, right-click on the
.mcworldfile and select Unarchive (Extract). - Wait for the extraction process to finish. Make sure files like
level.datand thedbfolder have appeared. - (Optional) Delete the
.mcworldfile to keep things tidy.
Step 4: Start the Server
- Go back to the Console menu.
- Click Start.
The server will boot up using the world you just imported. Now your friends can join and play in the world you made!